How to Properly Configure DTC for Clustered Instances of SQL Server (Revised)
Configuring the Microsoft Distributed Transaction Coordinator (DTC) for clustered SQL Server instances (FCIs) with Windows Server 2008 and later has been a confusing topic for many. The “definitive” word on the subject for awhile has been both of Cindy Gross’ blog posts ( “Do I need DTC for my SQL Server?” and “How to configure DTC for SQL Server in a Windows 2008 cluster”). In my opinion, with W2K8+, you really should create one DTC for each FCI and put it in with the SQL Server instance. This way it always lives on the node where the instance is currently running.
Having said that, what Cindy wrote doesn’t always work. In fact, the only truly reliable way some of us have found was talked about by my friend and fellow Cluster MVP (also a big SQL guy), Mike Steineke (blog | Twitter) in a post last week entitled “Clustered DTC and Multiple SQL Instances” where he shows how he had to configure DTC. Part of this is ensuring that even though DTC is in the group with SQL, it still gets its own name and IP address; using the SQL Server name can be problematic. To get this done, you really need to script it. I’ve done the work for you. Easy!
This updatated post stems from the blog post “Creating a Clustered DTC for SQL Server Redux“.
A sign that you need to use DTC for a given FCI can be found right in the SQL Server error log. If SQL Server cannot connect to a clustered DTC, you will see an error message like the following:
2013-03-12 10:23:51.670 spid1001 QueryInterface failed for “DTC_GET_TRANSACTION_MANAGER_EX::ITransactionDispenser”:0x8007138f(The cluster resource could not be found.).
2013-03-12 10:23:51.680 spid1001 QueryInterface failed for “ITransactionDispenser”: 0x8007138f(The cluster resource could not be found.).
This blog post now applies to Windows Server 2008, 2008 R2, and 2012 as well as SQL Server 2005, 2008, 2008 R2, and 2012 since depending on the OS you’re running, you may have a little of each …
Step One – Create the Clustered DTC in the Resource Group with the FCI (revised 3/12/2013)
The script below I actually created today and is based on my original blog post I wrote back in 2009 for Windows Server 2008 and takes into account what’s in Mike’s post. I actually used this script on a customer installation, so this isn’t something I wrote just for the hell of it. All you have to do is modify the variables up front and run the script. If you don’t know the name of some of the resources, you can use the PowerShell cmdlet Get-ClusterResource to show a list of everything.
For this update, instead of embedding the code, you can download the script from here. Much easier!
A sample execution is shown in Figure 1.
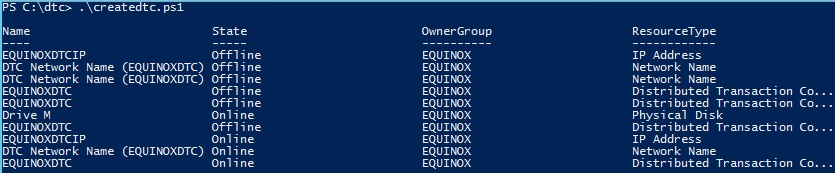
Figure 1. Running the DTC creation script
I also tested this script in Windows Server 2012 and it works just fine.
Step Two – Enable Network Access for the Newly Created DTC (revised 3/12/2013)
Once DTC is created, you must enable network access. This is where if you did things another way (i.e. not the way shown in this post), there’s a very high probability that when you went to go restart DTC (Step 11 below),the process may decide to step out for lunch and then stay away for a permanent vacation.
The steps below are all GUI. Nic Cain (Twitter | Blog) wrote up this blog post on how to configure this using PowerShell if you would prefer to script things.
-
- From the Start Menu, select Administrative Tools, and then Component Services (or just run DcomCnfg).
- Under the Console Root folder, expand Component Services.
- Expand Computers.
- Expand Distributed Transaction Coordinator.
- Expand Clustered DTCs. You should now see something that looks like Figure 2.
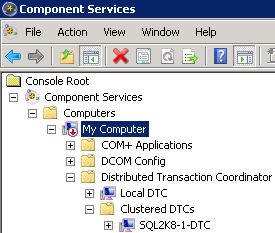
Figure 2. Newly created DTC in Component Services
- Right click the clustered DTC you just created and select Properties as shown in Figure 3
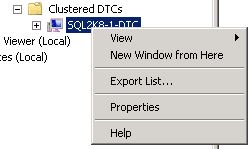
Figure 3. Opening the Properties of the DTC
- Select the Security Tab
- Under Security Settings, check the “Network DTC Access” box. Under Transaction Manager Communication, check both “Allow Inbound” and “Allow Outbound”. You should now see what is shown in Figure 4. If you need any other options (you know your app better than me), add them. Click OK when done.
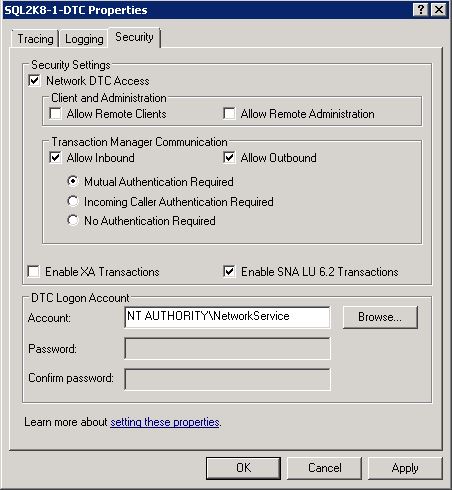
Figure 4. DTC enabled for network access
- You will now be prompted to restart DTC as shown in Figure 5. If you are doing this against a production instance of SQL Server and you have added the DTC resource as a dependency of SQL Server, it will take SQL Server offline as well. If you cannot do this, select No, but you cannot really use DTC properly until you restart it. To get around this, remove DTC as a dependency of SQL Sevrer, do the restart, and then add it back. Click Yes to restart.
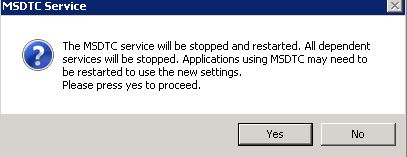
Figure 5. Prompting for the restart of DTC
- Click OK at the dialog shown in Figure 6 which denotes a successful restart.

Figure 6. Confirmation of DTC’s restart
Step Three – Testing DTC (added 3/12/2013)
Microsoft has a tool that will create a dummy transaction and can be found in KB 293799. While the best test is always your application, this will at least see if DTC is working. It requires an ODBC DSN to work.
- Start Data Sources (ODBC) from Administrative Tools. Note that under Windows Server 2012, you will specifically have a 32-bit and 64-bit version. Run the 32-bit.
- Select the User DSN tab.
- Click Add.
- On the Create New Data Source dialog, select SQL Server Native Client X, where X is the version of SQL Server. In Figure 7, it is SQL Server 2012, so it has a version of 11.0. Click Finish.
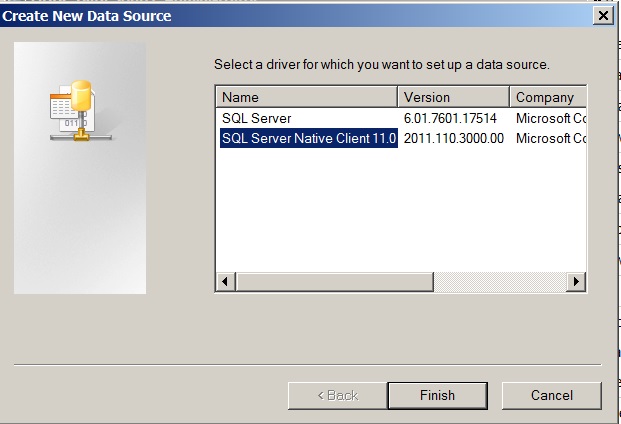
Figure 7. Selecting the version of SQL Server
- On the Create a New Data Source to SQL Server dialog which will look similar to the one in Figure 8, enter a name for your DSN and for Server, enter the name of the clustered instance of SQL Server. Click Finish.
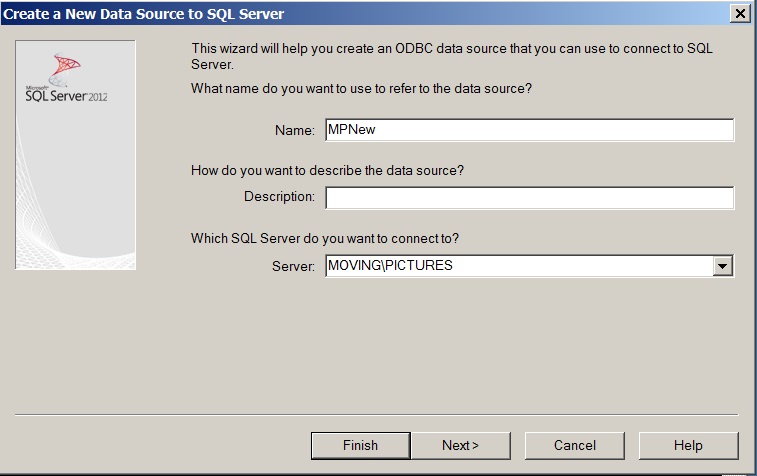
Figure 8. DSN creation
- On the ODBC Microsoft SQL Server Setup dialog, click Test Data Source. An example is shown in Figure 9.
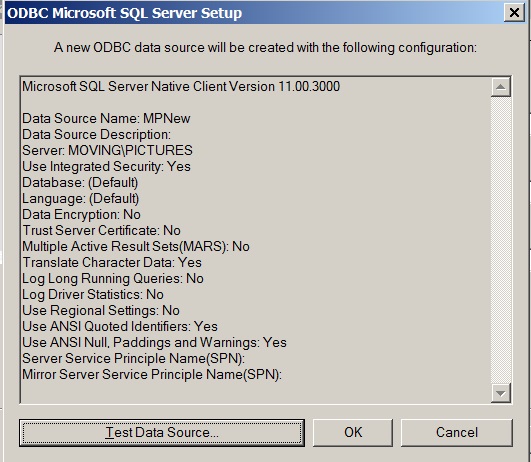
Figure 9. DSN created
- On a dialog similar to the one shown in Figure 10, if the test was successful, you should see the right output. If you don’t, you will see an error. Click OK.
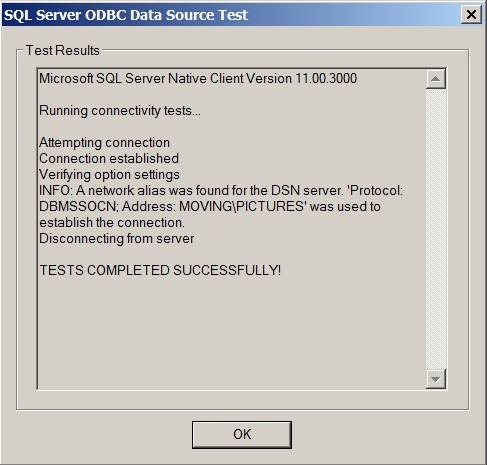
Figure 10. DSN works properly
- Run dtctester using the syntax dtctester DSN username password, where DSN is the name of the DSN you just created, username is a valid user in SQL Server, and password is the password for that user. A sample execution is shown in Figure 11.
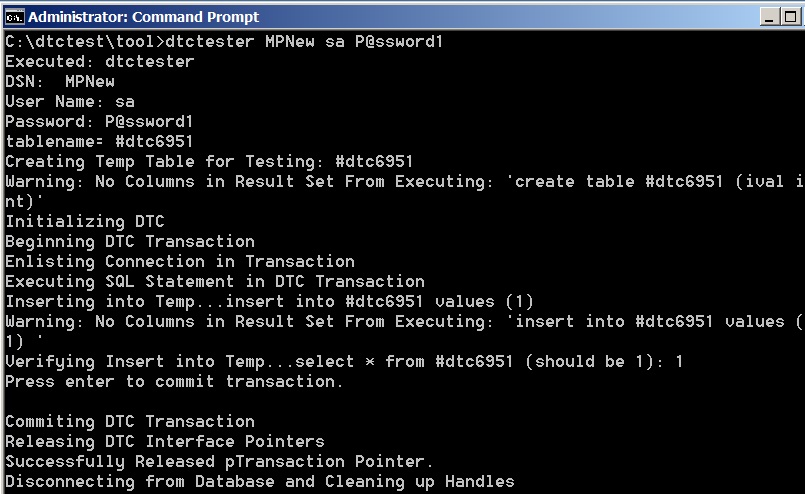
Figure 11. Runing dtctester
WARNING Do not create a System DSN. If you do, you may see an error similar to the one shown in Figure 12. This error stems from the fact that dtctester is a 32-bit program and the System DSN created is 64-bit.
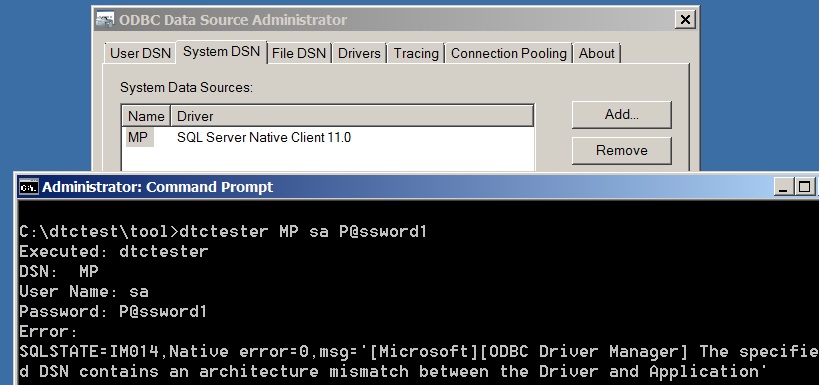
Figure 12. dtctester error
Step Four – Optional Configuration Steps (added 3/12/2013)
The steps in this section are optional. Read to see if they apply to you.
Setting the DTC Resources to Not Cause a SQL Server Failover
There are four resources associated with DTC: name, IP, disk, and of course, DTC. If you right click on any one of those and select the Policies tab, you will see what is in Figure 13.
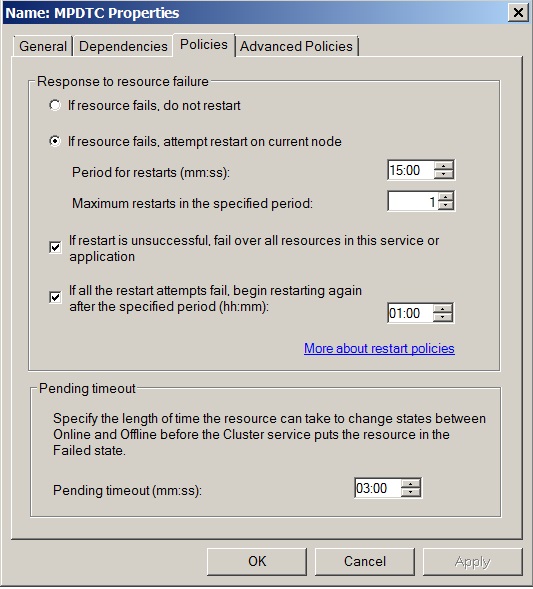
Figure 13. Policies for the DTC Network Name
Notice the option “If restart is unsuccessful, fail over all resources in this service or application.” What this means is that if any one of those resource fails and cannot be restarted, it will cause SQL Server to fail and move to another node. If you are not sure if DTC is necessary but are creating it anyway OR you are OK with DTC failing but SQL still being up and living with whatever not working that DTC affects, deselect this option.
Adding DTC as a Dependency of SQL Server
In the testing my friend Mike did, the only way he could get things to work was to ensure that DTC was up before SQL Server. The only surefire way to do this is to add DTC as a dependency to SQL Server (see the previous section for possible implications of doing this). One of the problems that may occur and was noted in the blog post “” is that there is a chance that SQL Server Agent may go offline. We think this is possibly related to another bug that was fixed, but what is happening is that SQL Server Agent is trying to figure out the name of the instance it is using. If it gets confused, it will go offline. It may start, but it also may not work correctly. The only way it seems to work around this is to make sure that DTC is up before SQL Server starts, hence adding it as a dependency.
Once you get DTC up and running in the group with SQL Server, test your application against it and check in the SQL Server error log as noted above. If you see no DTC errors and everything looks fine in the app, you’re golden. You shouldn’t have to restart SQL Server to take advantage of the newly mapped DTC, but without an application right now, I can’t say this to be 100% true.
Adding a dependency to a resource in Windows Server 2008 and later does not require any downtime.
To add DTC as a dependency of the SQL Server resource in Failover Cluster Manager:
- Right click on the SQL Server resource and select Properties.
- Select the Dependencies tab.
- Click Insert.
- On the new line, from the dropdown select the DTC resource you created. An example is shown in Figure 14. If the line is at the bottom, make sure that the AND dependency is selected.
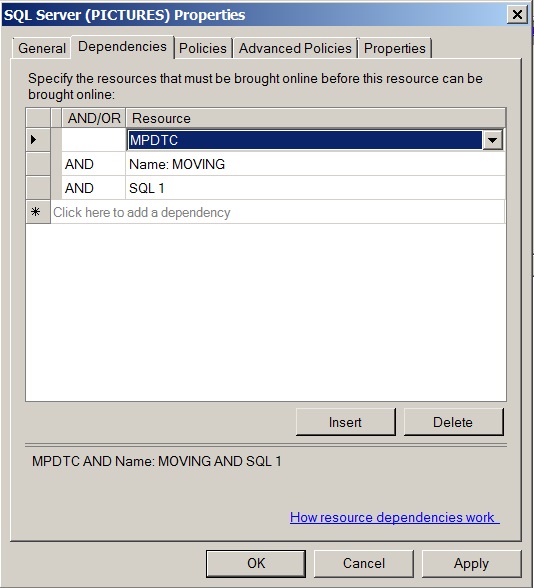
Figure 14. Adding DTC as a dependency
- Click OK when done.
To do this in PowerShell, execute the following:
Add-ClusterResourceDependency SQLResourceName DTCResourceName -Cluster WSFCName
A sample execution is shown in Figure 15 along with verifying that it was done correctly.
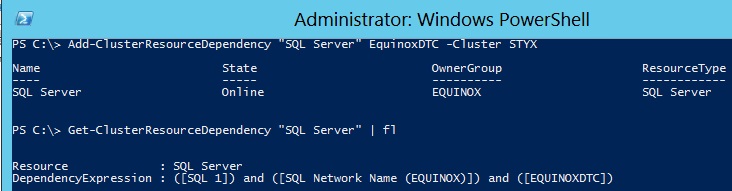
Figure 15. Creating and verifying the dependency in PowerShell
Mapping DTC to a Specific FCI
Right now I do not have an application to test specifically the combo of DTC and the FCI in the same group that all is well without adding the DTC resource as a dependency. Based on what we know, it may not work. One thing which may solve that issue and/or if you want to truly be anal about things, DTC provides you with a way to specifically map an instance of DTC to only be used with a specific application or service such as a given SQL Server instance. This is done via command line. If you really want to ensure that DTC is mapped to the FCI, you use the tmMappingSet option of the command line for DTC.
NOTE This particular aspect/option most likely will NOT be necessary but I’m putting it in here for the sake of being complete.
- Enter the command msdtc -tmMappingView * as shown in Figure X. If nothing is mapped, you will see the output in Figure 16.

Figure 16. No DTC mappings exist
- To map the newly created DTC to a specific FCI, use the command: msdtc -tmMappingView -name DTCname -service SQLServerService -clusterResourceName SQLResourceInWSFC, where -service would be MSSQLSERVER for a default instance or MSSQL$NMDINS where NMDINS is the part after the slash and -ClusterResourceName is the name of the SQL Sevrer resource in the Windows Server failover cluster (WSFC). For a default instance it would just be SQL Server, and for a named instance SQL Sevrer (NMDINS). A sample execution for a named instance is shown in Figure 17 and you should see Figure 18 if it is done correctly.

Figure 17. Mapping DTC to an FCI

Figure 18. DTC mapped successfully
- To verify things are correct, again enter msdtc -tmMappingView *. You shold now see something similar to Figure 19.
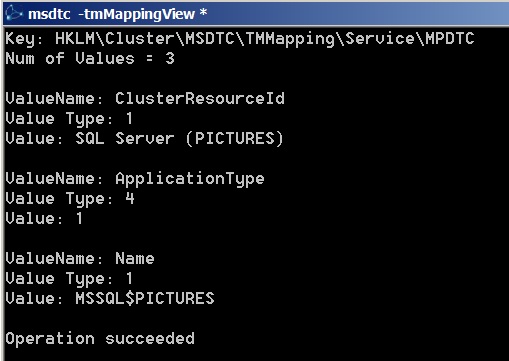
Figure 19. Successful mapping output
Pingback: configure clustered DTC | Bart Vincke's Blog
Pingback: AlwaysOn AG, DTC with failover | XL-UAT
Pingback: TransactionInDoubtException | Henrik Stuart
Good post especially setting up the security, we also found another issue:
The ClusterResourceId value was not updated when re-creating a MSDTC resource. The value here [HKEY_LOCAL_MACHINEClusterMSDTCTMMappingServiceMapping] ClusterResourceId should match the output of
(Get-ClusterResource | ? {$_.name -like “MSDTC-” }).id
we set this and it auto-replicated to all nodes for 2 instances and for the 3rd instance we had to set on all cluster nodes. This got rid of the DTC_GET_TRANSACTION_MANAGER_EX error
HTH
Ben